The maintenance costs for a Tesla are very low compared to a vehicle with a combustion engine. The regular mandatory maintenance intervals are also eliminated. Nevertheless, there are some jobs that should be done regularly even with a Tesla. Replacing the cabin filter is one of them. It prevents pollen, industrial and road dust from entering via the ventilation system. Tesla recommends renewing the cabin air filter every 2 years. Since this replacement is not that difficult, you can easily do it yourself. I ordered a replacement filter for my Model S on the internet and in this article I describe how to replace the filter yourself and disinfect the air conditioning system simultaneously.
These instructions are only valid for the Model S Facelift model (from 2016) and all Model X. For the older Pre-Facelift Model S vehicles the procedure is slightly different.

Console tray with Armrest Hidden Cubby Drawer
Shop for more Tesla Accessories here!
Where does the Tesla cabin filter actually sit?
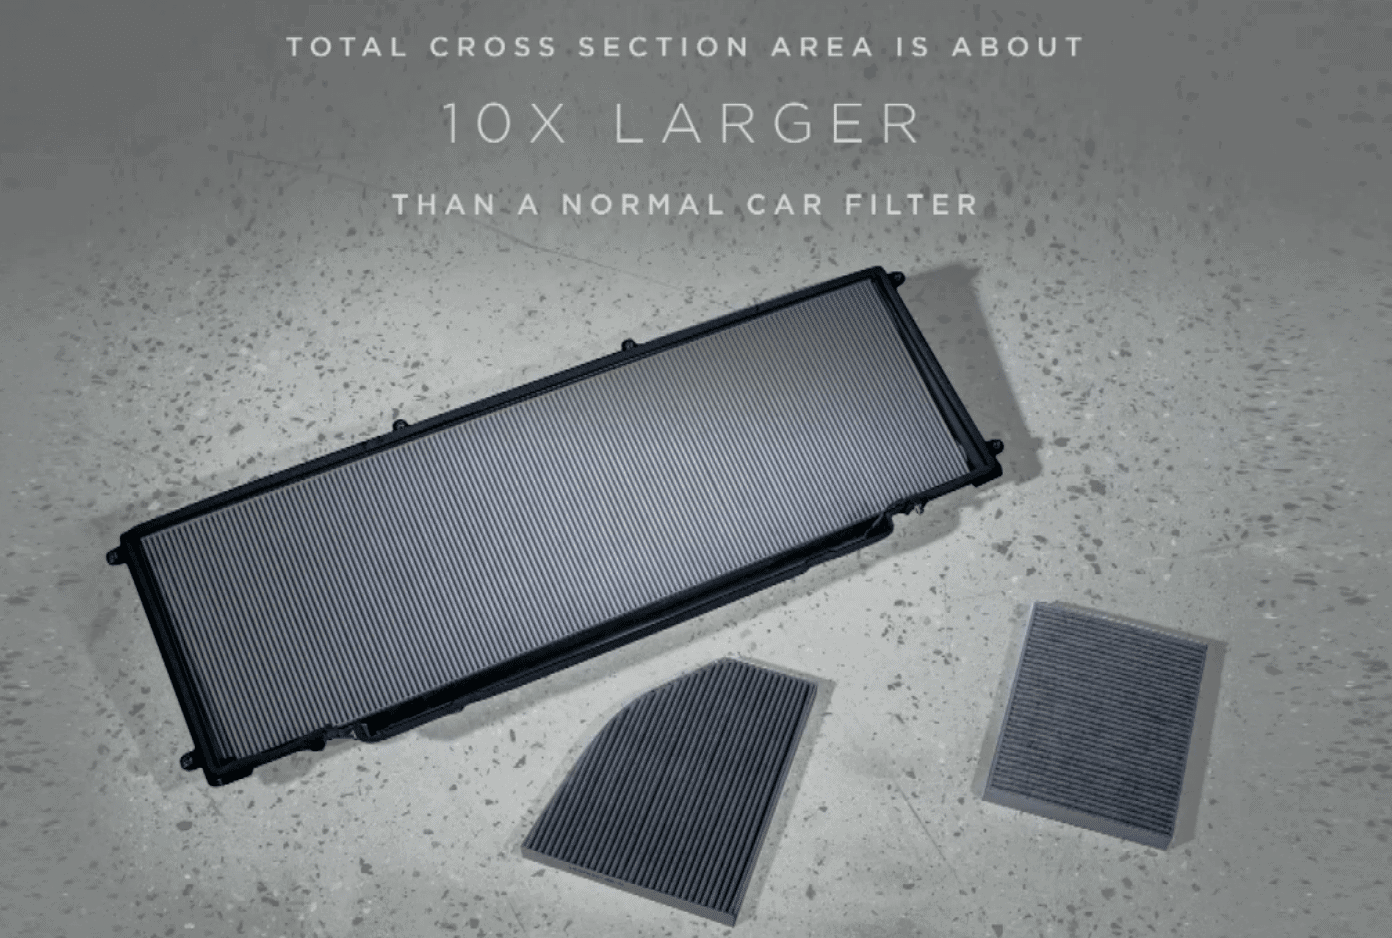
Most facelift models S and Model X have two air filters. There is the cabin activated carbon air filter, which is installed behind the glove compartment under the dashboard. This filter is what this manual is about. In addition, these vehicles also have a HEPA air filter, or at least the holder for it. In early facelift models the HEPA filter was sold as an option.
What tools are needed for the exchange?
A new Tesla cabin filter can be easily ordered at the Tesla Service Center or at Amazon.com:

PureFlow by Premium Guard with 4 filtration levels
PureFlow by Premium Guard with 4 filtration levels

To loosen the panels in the vehicle interior, it is recommended to use appropriate tools that do not scratch the plastic parts. You can order such a set at Amazon.com:

Removing the interior trim
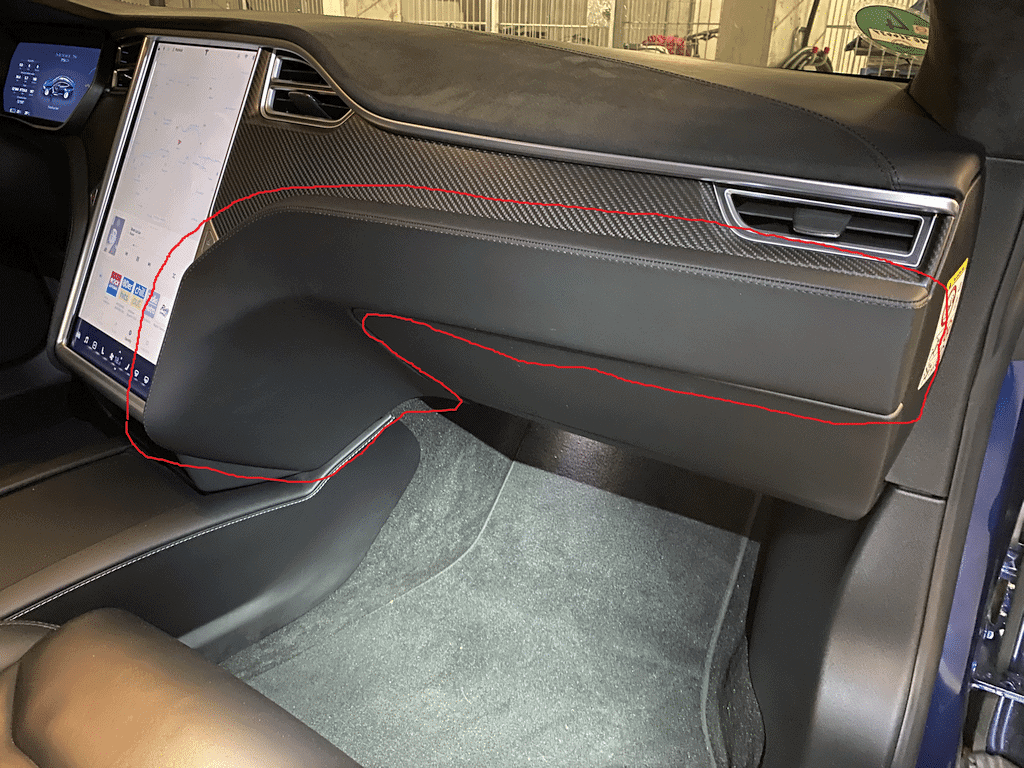
To get to the filter, it is necessary to remove a part of the interior trim on the passenger side. I followed the procedure in this video because it is the same for model S and model X. The first step is to remove the fairing above the glove compartment. This is best done with one of the big wedges. You have to use quite a lot of force and maybe get the impression that you are breaking something. But with a bit of courage and strength, the retaining clips can be released easily. Professionals don’t do it any differently.

The panel itself is fixed with 13 clips:

In the next step these 6 screws are loosened with a 20 Torx screwdriver:
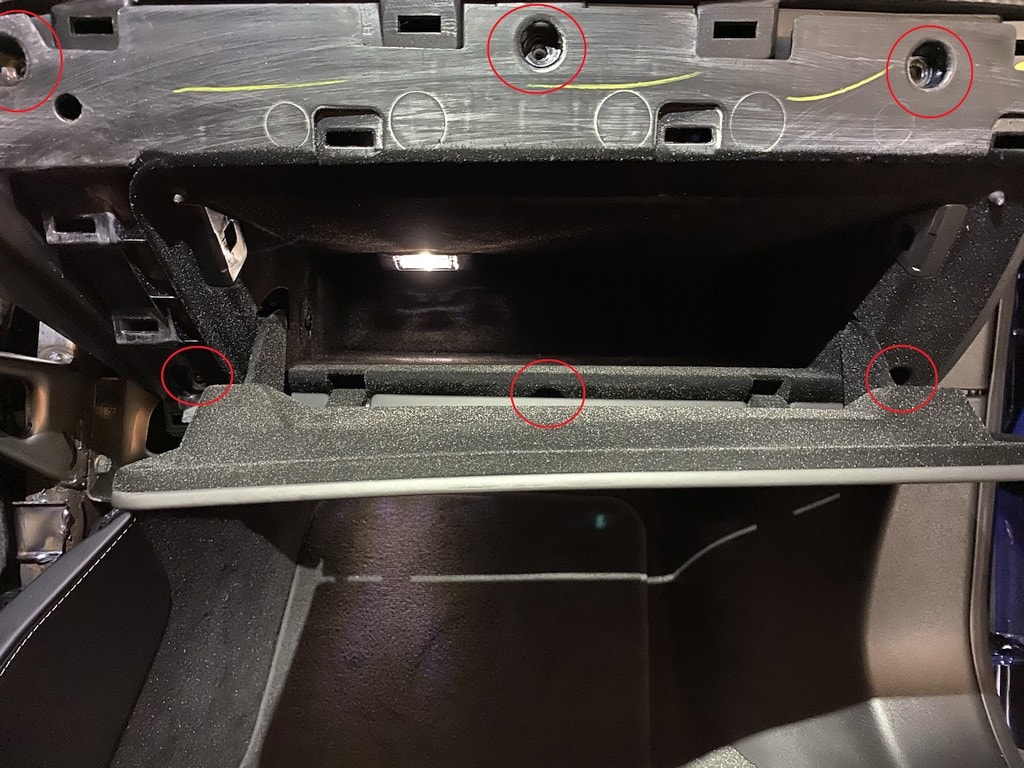
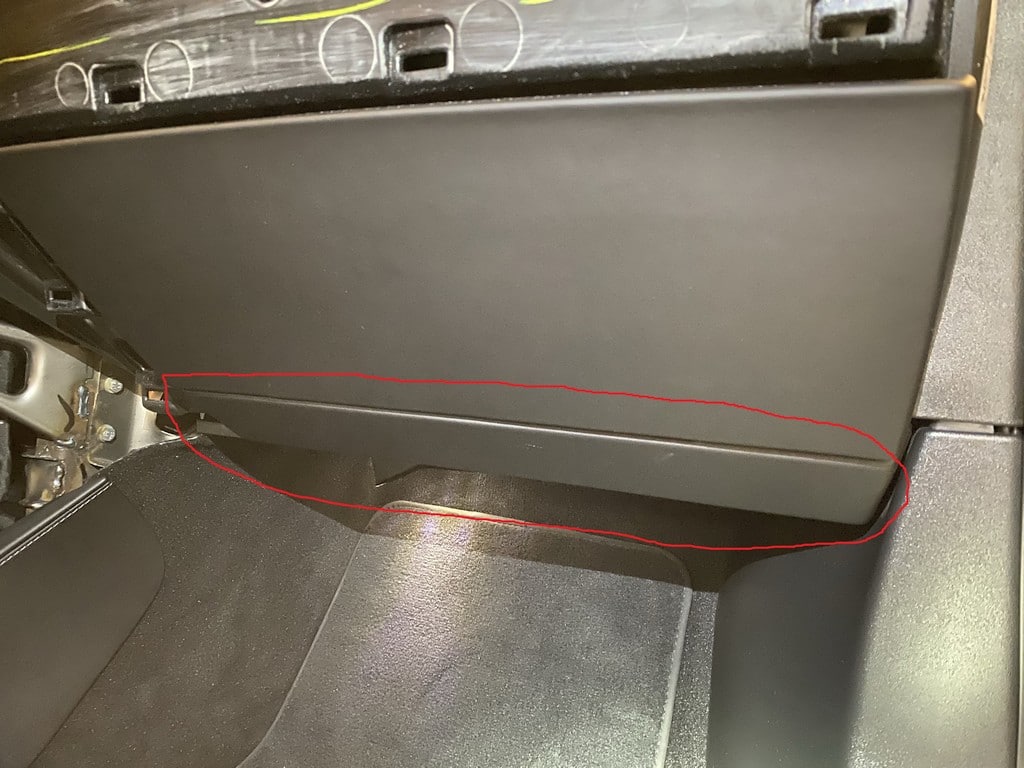
Then remove the small panel under the glove compartment:
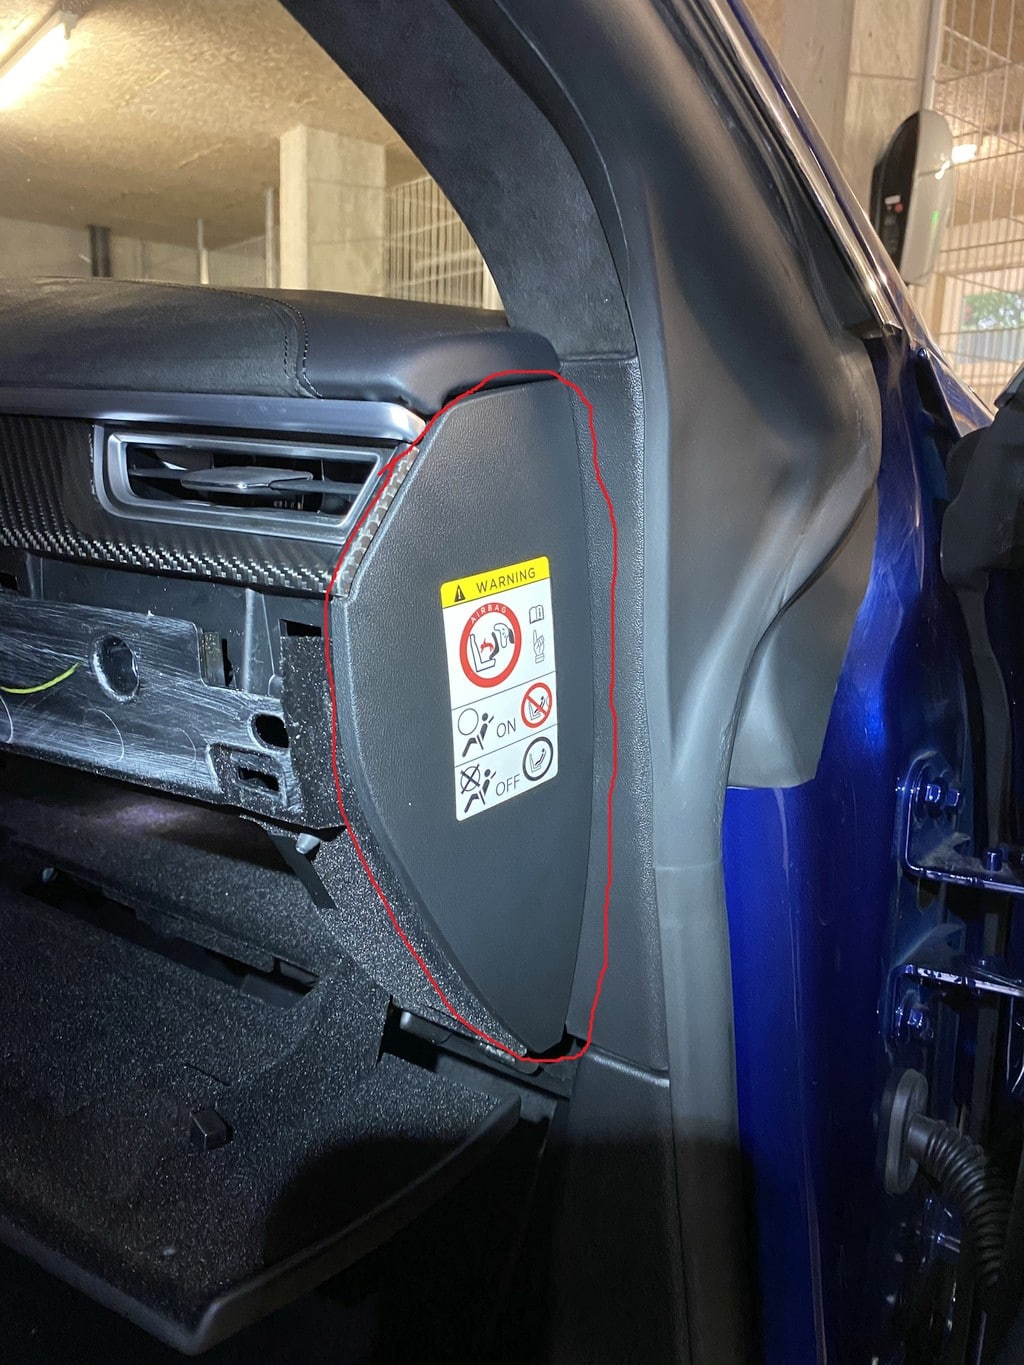
To be able to remove the glove compartment, this side panel must also be removed:

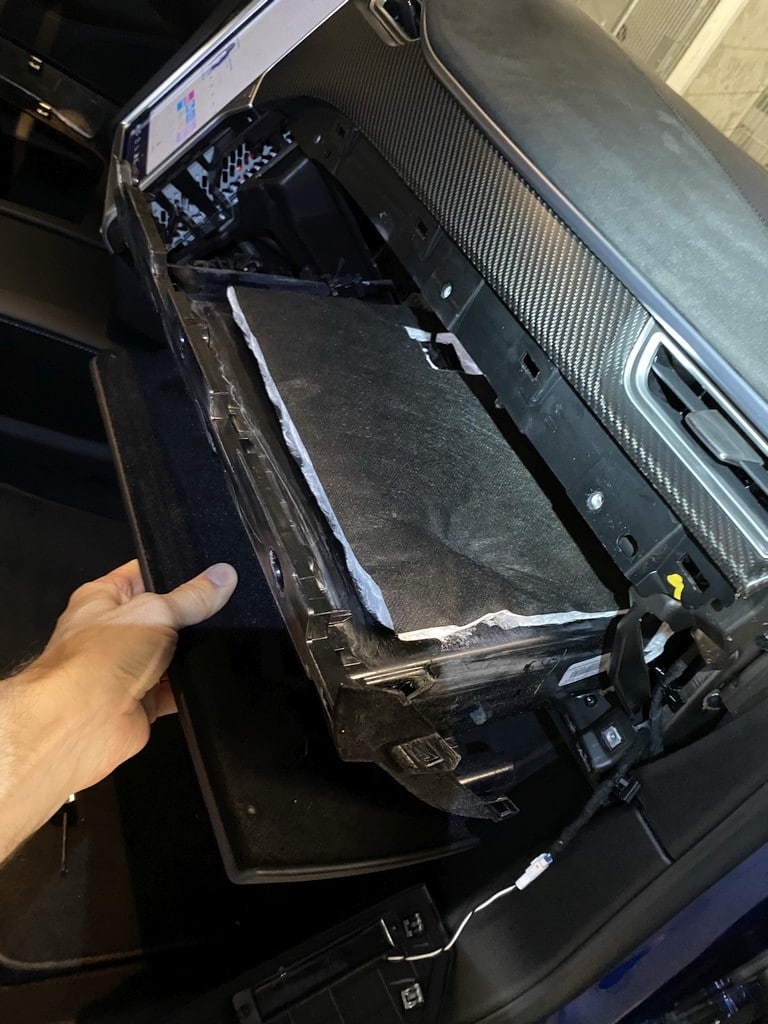
The glove box can now be removed carefully (attention: three cables lead to the glove box).
This cover is located behind the glove compartment. It can be opened and removed by pressing on the right side:
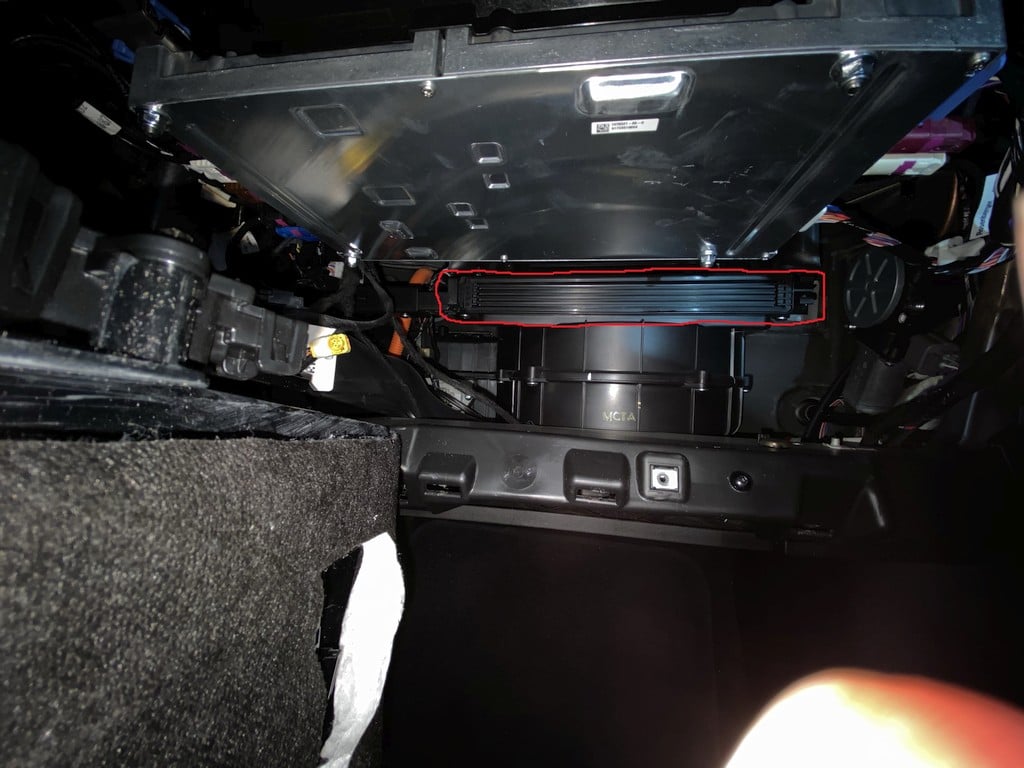
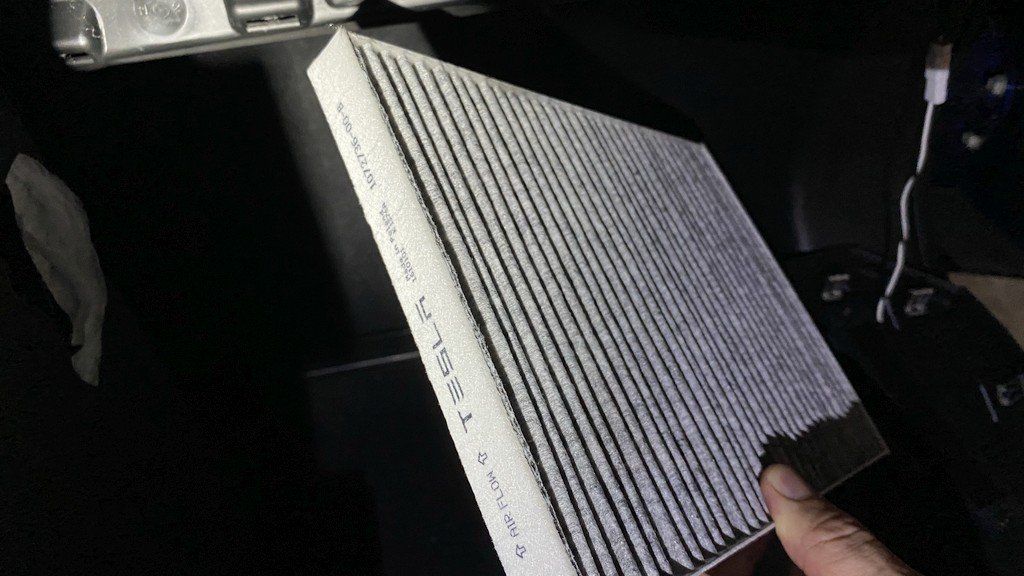
Then remove the Tesla cabin filter from the shaft and ensure that the replacement filter is inserted with the correct airflow direction.

The assembly then simply works reverse order. When attaching the cover in front of the filter, first hook it on the left side and then snap it on the right.
Recommended cleaning agents to disinfect the air conditioning system
It is recommended to disinfect the air conditioning system simultaneously as changing the filter to remove bacteria and fungi in the air ducts. This also removes unpleasant odors that are produced after the air conditioner is running and the vehicle has been stationary without let the evaporator of the HVAC. Condensation water on the evaporator cannot dry off if you park immediately after running the air conditioning system. This promotes bacteria and fungal growth. A cleaning foam provides relief.
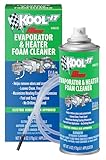
Ideally, the contents of the spray should be applied as close as possible to the evaporator of the air conditioning system. This is where most bacteria and fungi are present due to the moisture. Unfortunately, the evaporator is not easily accessible. The best suitable cleaning products are those with a long hose that can be attached to the can. Spray cans without a hose, which are only placed in the foot well and transport the cleaning product into the air conditioning system via circulating air, are not very effective and the stink comes back after a few weeks.
This is a recommended product with hose. The nozzle at the end of the hose is nice and small and can easily be pushed through the ventilation outlets to the evaporator.
Apply the cleaning foam
Unfortunately, the evaporator of the Model S cannot be reached via the filter shaft because the fan is in the way. A compromise is to insert the hose of the cleaning spray through one of the two middle air nozzles in the cockpit. In my opinion the easiest way to do this is via the middle air nozzle on the driver’s side. Move the hose carefully back and forth if it gets stuck. Insert the hose as far as possible and apply the spray there first. ATTENTION: The blower should be on level 1 during this procedure, otherwise the access is blocked by a flap and you cannot get further with the hose. The working steps are as follows:
- Set the blower to level 1 and set the air conditioning function to manual (no cooling).
- Let the fan run for at least 15 minutes so that the evaporator can dry off completely.
- Insert the hose completely into the ventilation and apply the contents of the spray.
- Carefully pull out the hose
- Immediately switch off the fan completely (keep fan symbol pressed down)
- Allow the cleaning agent to work for at least 15 minutes.
- Then run the blower on level 1 for 5 minutes (air conditioning function still on manual. No cooling).
- DO NOT use the climate function for several hours to allow the cleaning agent to take full effect.
Note: The author of this article takes no responsibility and liability for any damage to your vehicle caused by this tips.
My USB Flash Drive recommendations for Sentry Mode and Dashcam: